Overview: The Competitions Import allows for ease of adding / importing / updating Schedule or Game-related data into the system at once.
Required fields: Each Import type has required fields. If these fields are not included the file will not be accepted.
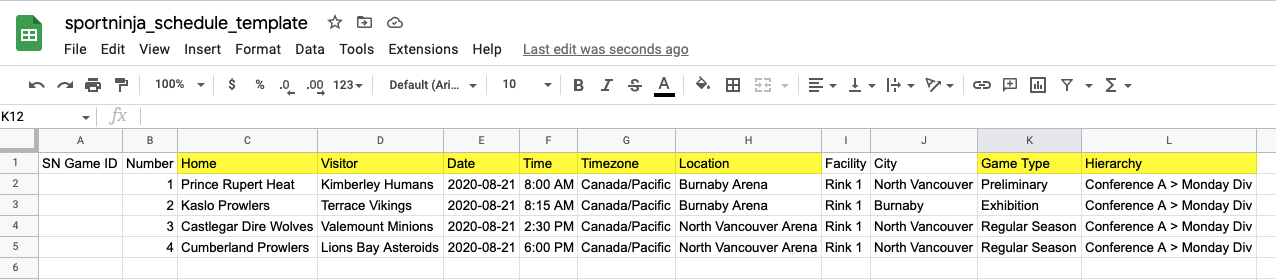
Highlighted are required fields

Schedule Import Tips:
-
The best way to do get your custom import format is to add one game manually then download/export a copy of the file (from the schedule tab). Then, add your schedule and use that to re-import.
-
You remove the last column, "Hierarchy", when you import, as the system will automatically recognize the division the team is in. This will make adding your schedule easier too. (Exception: If adding placeholder teams - you will need the hierarchy/division specified)
-
The first column "SN Game ID" should be empty if you are looking to ADD or import new games. It will be populated with a unique game id after you add the game for the first time.
-
The most common challenge with importing is ensure the Teams in your schedule file have been added to the Set up tab for the Competition AND the team names exactly match the naming convention, spacing and punctuation in the system. If they don't match, the system will throw an error letting you know that it couldn't find that team.
-
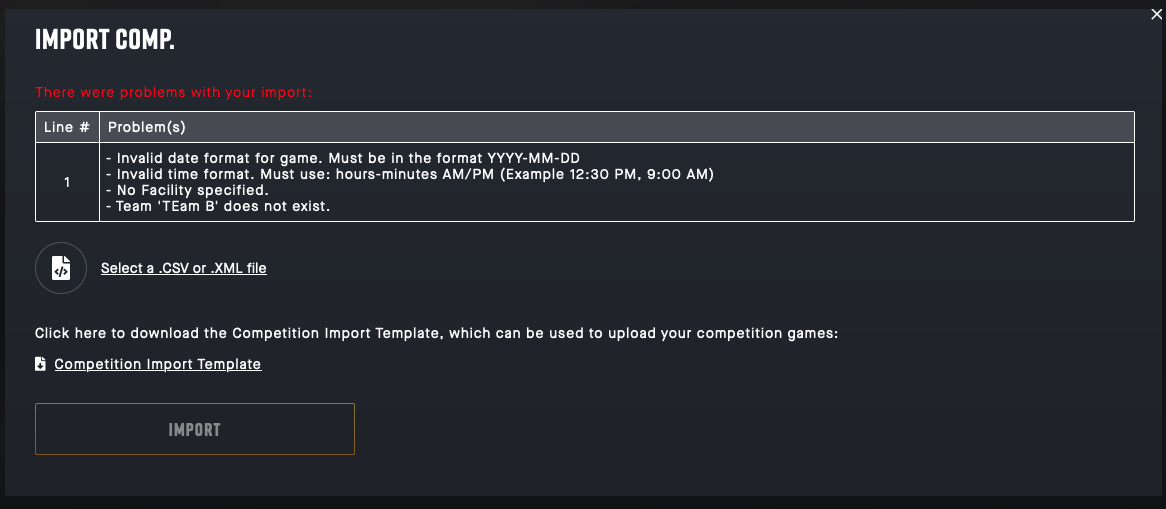
When you import, any rows that are successful will go in. If any rows error out, you will see the errors on the screen and will be able to download a copy of just the rows that errored out. We recommend keeping the error screen open and then opening up a new tab/window to address the errors you see. You can keep importing like this until there are no more errors.
---------------
Steps:
(Pre-step)
Add 1 Game-only and Export your schedule (then skip to Step 2): It's recommended that you add 1 Game in manually (on the web). This will give you all the specific details for your Competition's template formatted and filled out for you in the first row (which can be copied to the next rows and edited as needed).


Export your 1-game Schedule (and skip to step 2)
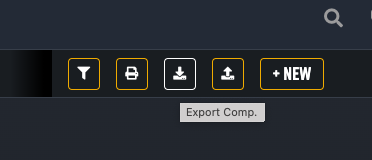
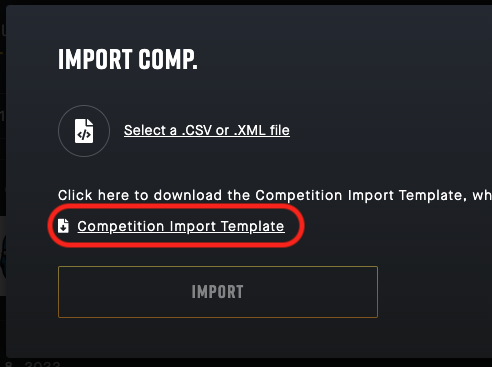
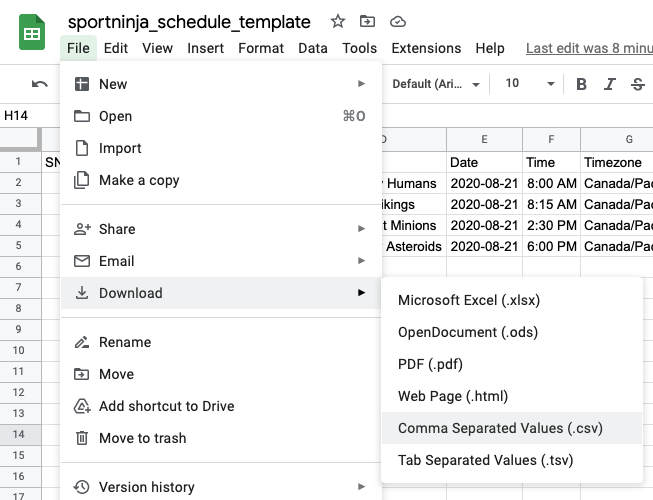
- Download: Navigate to your Competition page and Download a copy of the Competition Import Template file. It will download as a ".csv" file. Note: If UPDATING schedules...download a copy of your existing Competition data instead, using the "Export Comp" button. It uses the same file format, but will include any schedule data you currently have in the system.

- Edit: Open the file with an editing tool (eg. MS Excel, Google Sheets, etc). You may want to open it as a .xls, or .xlsx. file to make it easier to edit. Then, Edit the file by adding in your Schedule and associated data. Note that you should not edit the field names at the top, and you cannot add any extra columns. You can only enter data for the fields in the file.
- Save: Re-save or download your file as a ".csv" or ".xml" file, as this format is required for import.
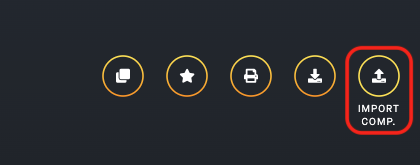
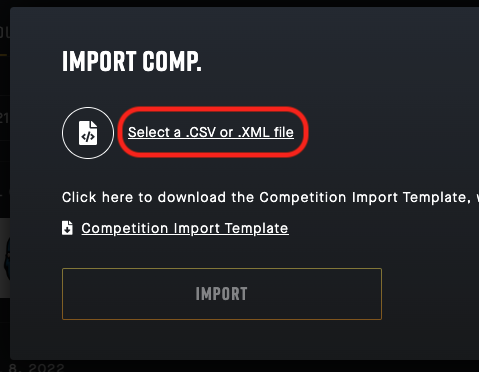
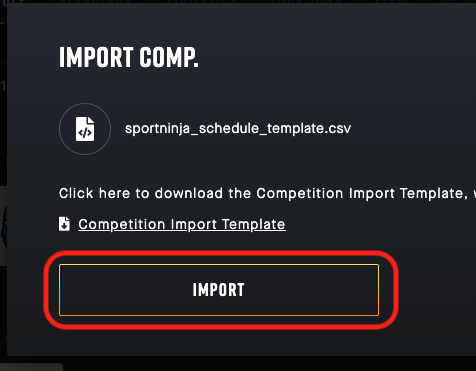
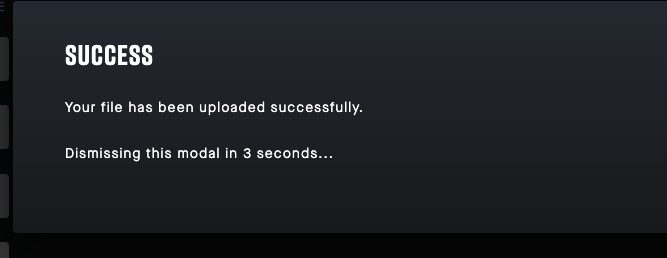
- Import: Import your updated file by clicking on the "Import Competitions" button, then select your updated .csv file from its saved location. If your file was successfully imported, the pop-up window will automatically close after a few seconds. If your file is not accepted, you will receive error messages suggesting the route of the issue. Review, update the file as necessary and attempt again.
Visual steps:
1. Download the file template

2. Edit
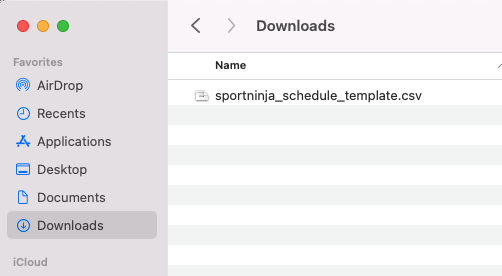
Find the file in your Downloads folder
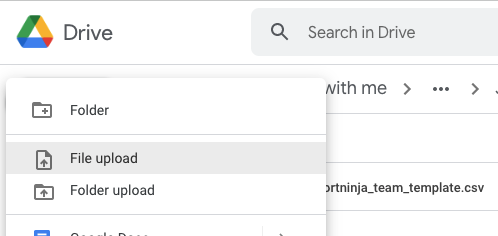
Option A - Upload the file to your Google Drive, then open it with Google Sheets.
----

Option B - Open the file with your own editing tool (eg. Excel, Numbers... as a .xls or .xlsx)

Update the file with your new Schedule/Game data.
(Note: It's recommended that you delete the first "SN Game ID" column (ie. column A) entirely from the file (unless you are updating existing Schedule data). This field is a unique identifier used to match against existing Games in the system, the import will fail if any of fields in this column are left blank.)
Per above, the highlighted fields are required for import. The fields not highlighted are optional.
3) Save:
Save your file again as a ".csv" or ".xml" file.
4) Import: Go to the "Import Teams" button
Navigate to your saved file

The import button will now be highlighted and selectable.
The file will either import successfully, or it will fail with error messages:
Success!
Error Message examples...
If you are still having trouble, review these articles:
Import/Export - Troubleshooting
Import/Export - Mass Delete Schedule